
PuTTY is a free telnet and SSH client for Windows and UNIX. This article covers how to log into an SSH server using PuTTY on Windows. I have not used PuTTY on a UNIX based system but would assume the process for doing this would be the same for both systems (I use the command line ssh command when using UNIX systems and do not find the need for a GUI ssh client). The second page of this article covers howto convert an openssh key into a putty key using the puttygen application.
Downloading and Installing PuTTY
Download PuTTY from the PuTTY Download Page. Scroll down to the appropriate section for your operating system and download the putty.exe file. If you are going to log into a server that requires RSA or DSA keys the puttygen.exe file as well to convert your private RSA or DSA key into a PuTTY key.
There is no installation required of these two files. Save them somewhere on your computer that is easy to find and all you need to do is execute them. To uninstall simply delete the files.
Configuring PuTTY
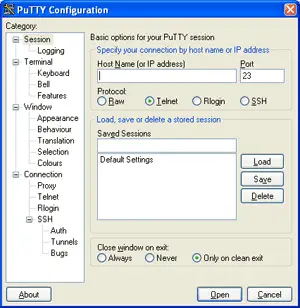
When PuTTY is started the configuration screen is displayed as shown in the screenshot below.
To connect to an SSH host all you need to do is to enter the domain name or hostname of the SSH server into the “Host name or IP Address” box and change the radio button for the protocol to “SSH”, which will automatically change the port number to 22 (the default port 23 is for telnet sessions).
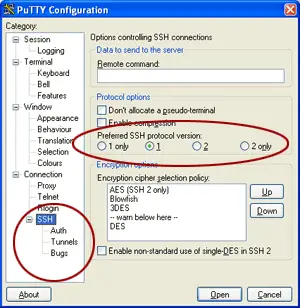
If the SSH host only supports SSH version 2 then you will need to change the SSH protocol version as shown in the screenshot below. Select the “SSH” configure option in the left navigation and then change the protocol version in the right part of the window. These are highlighted with red circles in the screenshot below. To return back to the main configuration screen select the “Session” option from the left navigation.
Loading and Saving PuTTY Configuration Settings
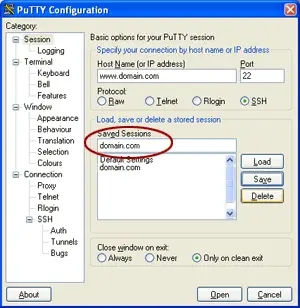
The PuTTY configuration settings can be saved at any time by entering a name into the “Saved Sessions” text box (highlighted in red below) and then clicking the “Save” button next to the list of saved settings. The name can be anything you want and doesn’t necessarily need to reflect the hostname of the SSH server as shown in this example.
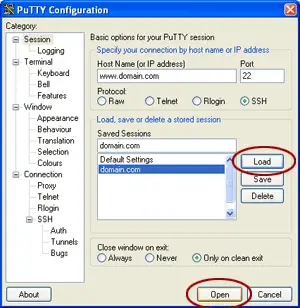
To load a saved PuTTY configuration, select it from the list of saved settings and click the “Load” button. The is illustrated in the screenshot below. Note also the “Open” button is highlighted; this is what you click to actually connect to the SSH server.
Connecting to the SSH server
To connect to the SSH server with PuTTY click the “Open” button once all the configuration options have been set. This is illustrated in the screenshot above where a saved configuration has been loaded. The “Open” button is at the bottom of the window. To exit PuTTY at this point instead of connecting click the “Cancel” button.
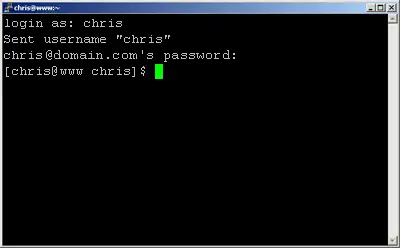
The screenshot below shows PuTTY connecting to the SSH server. It first prompts for your login name (entered here as “chris”) and then for your password. The password is not echoed to the screen. The screenshot below shows a successful login with the command prompt awaiting a command from the user. To log out use whatever command is used to logout from the server you are logged into (typically “exit”, “logout” or ctrl+d).
PuTTY Security Alert
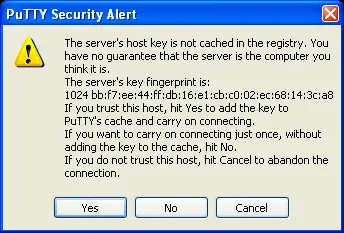
After clicking the “Open” button to connect to the SSH server you may get a warning like the one in the screenshot below. Click the “Yes” button and you will connect to the SSH server. SSH clients store the server’s host key and because PuTTY does not already have a copy of the host key it shows the warning.
Key is of wrong type (PuTTY SSH2 private key) Error
If you get an error message like so when you try to log in:
Trying public key authentication.

Key is of wrong type (PuTTY SSH2 private key)
then you are attempting to connect to an SSH1 server with an SSH2 key generated using the puttygen application (as described in the convert RSA and DSA key files with puttygen post). Go to the Connection/SSH options page and make sure the “Preferred SSH protocol version” option is set to either “2” or “2 only”.